

Front Porch Musings
Share
I often feel overwhelmed and paralyzed when thinking about my home projects in giant categories: “the exterior”, “the landscape”, or “the basement”. One of my favorite things about Continuous Improvement is the tenet of decomposing big projects into small, achievable steps. I call this the “how not to get overwhelmed by the ‘whole’ ” theory.
Even though I call on that tenet quite often when walking my friends, family and clients through their change processes, when it comes to our home projects, I confess it is not an exercise that comes easily to me. The ‘whole’ of our home overwhelms me often. Maybe it is the fact I feel enormous pressure (self-inflicted) in making all my sketches and long term plans come true for our home, or maybe it is the fact I suffer from anxiety. In either case, today I am letting you into both my mind and this continuous improvement exercise. Let’s walk together through an example of how to break down the ‘whole’ into an achievable one-step-at-a-time, since all you will see on Instagram is the final picture (and none of the money invested, the five years of work, all the interim steps in this process without a fully satisfying “reveal”).
If you have been following the blog from the beginning, you will notice we have yet to mention the exterior of our home aside from our front door and porch, and there is a reason for that — none of it is finished. We have done a huge amount, yet, in a full-acre property that had many (many, many, many) issues, five years went by in a blink and very little “done”.
Panic attack zone: Thinking about the whole Exterior as a category.

Subdivide categories within “Exterior”: Structural, Lighting, Safety, Driveway, Sidewalks, Fence, Landscape, Trees, Porch, …
Focus on the subcategory you are working on: The Front Porch. (You, blog reader, may think: Porch? Again? To that, I say: Still! Remember we addressed a few things on the old post, but not all the steps taken!) So, for the sake of this Continuous Improvement exercise, here is the full breakdown of this “small” project over the last fiver years:
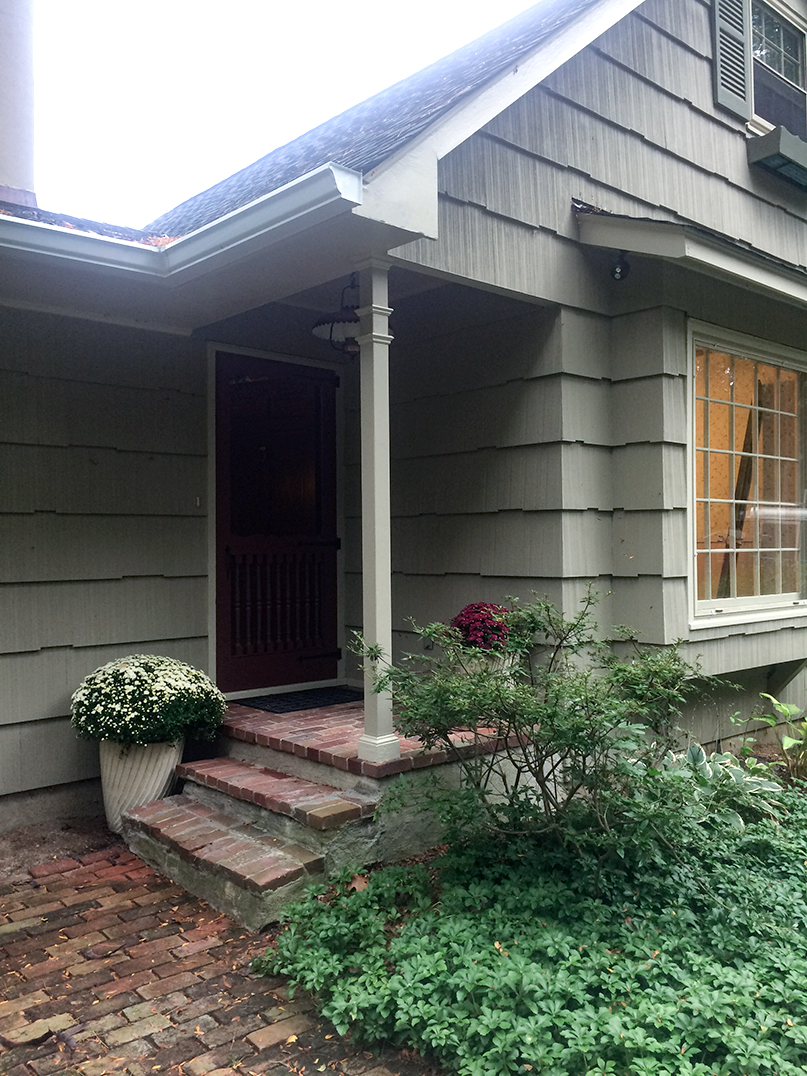
The Original Porch

1. Structural
1.1 The Front Door
We addressed all the details of our front door in this post: when, why, how, results, how we like it. And, even though we aren’t going to bore you by repeating them, that was a massive first sub-step within “Structural”. It is worth a read.

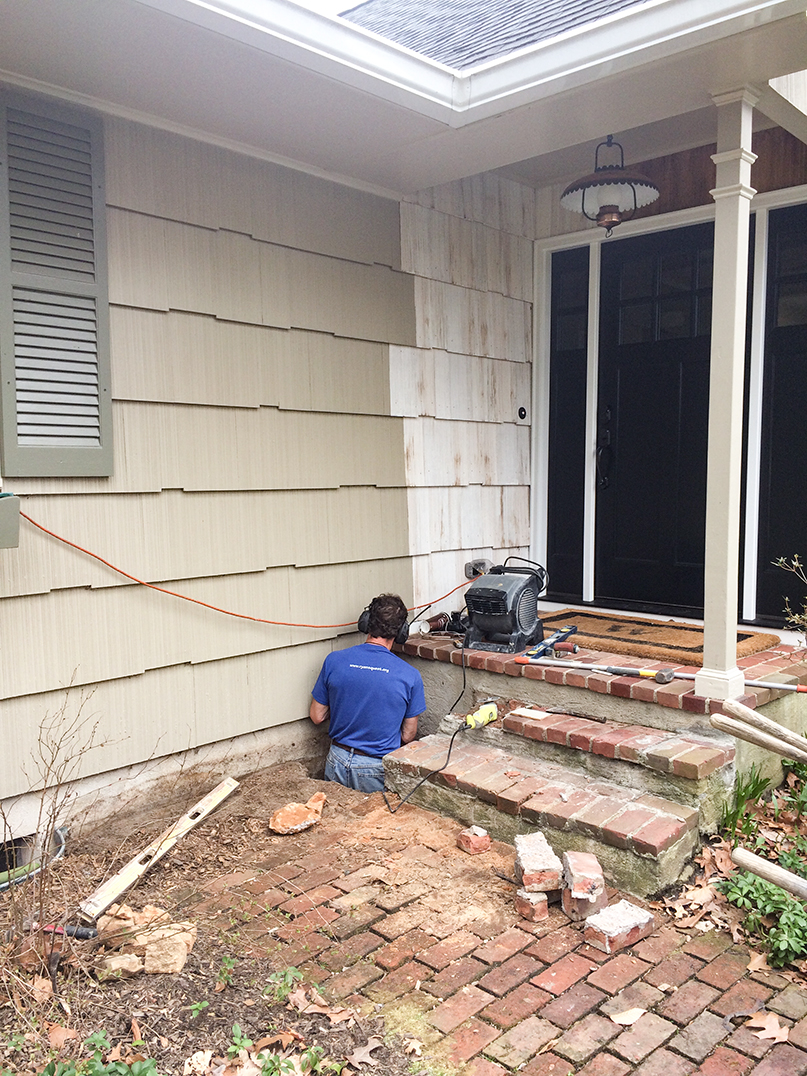
1.2 Steps Sagging and the “hole”
When we purchased the house, we could see our original front porch had issues. Not only were the steps sagging, but there was a 20” hole from the top of the porch to the ground. My worst nightmare for a while was my then-toddler (or a guest!) falling into that hole! So, until we went through the major construction and for the whole year that followed, I kept a giant vase with flowers there so people wouldn’t be tempted to step off the porch.
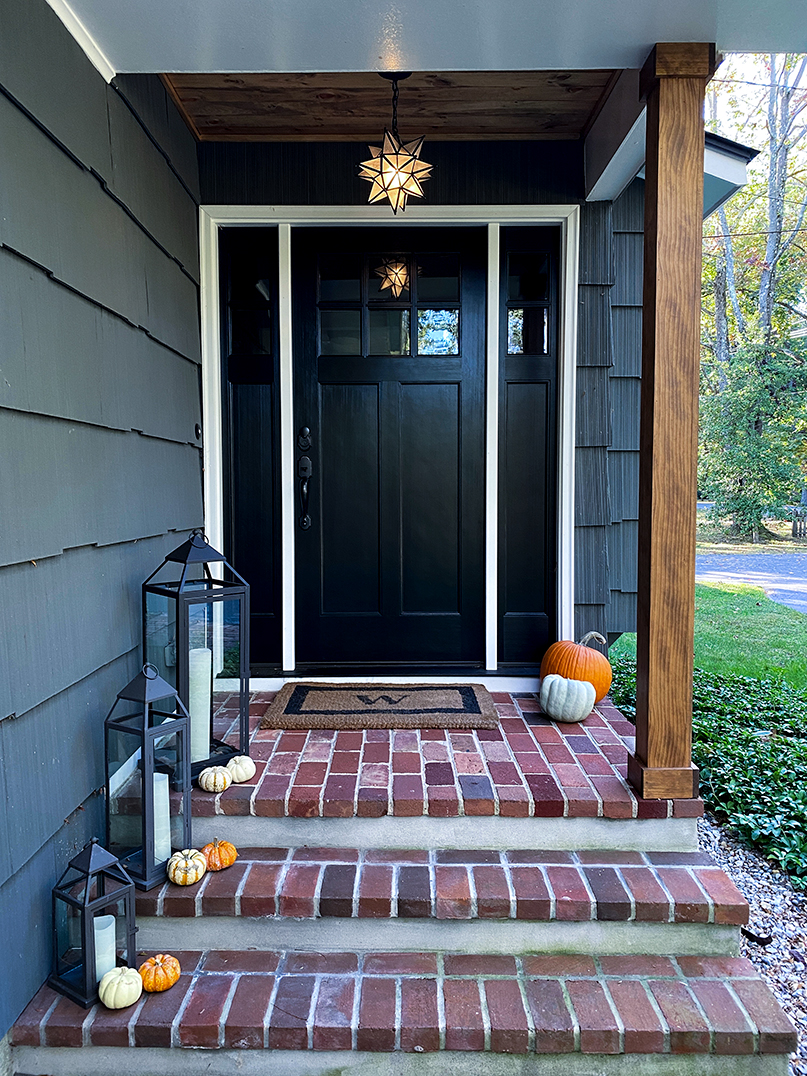
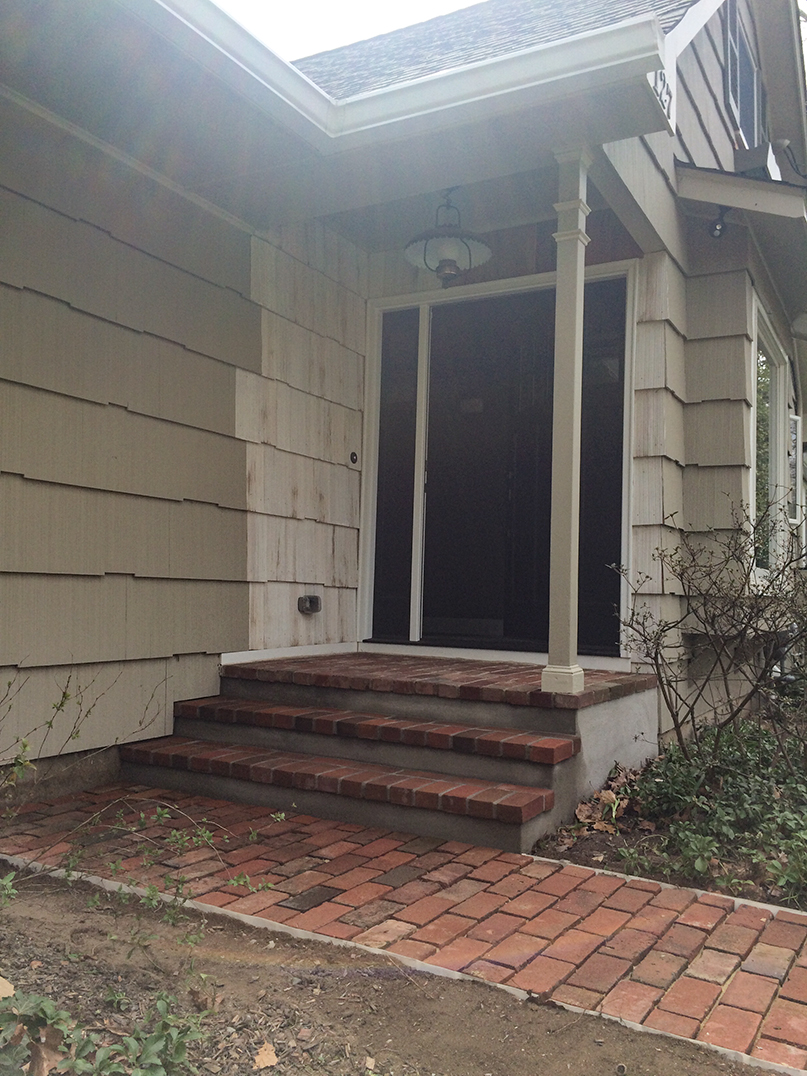
In the Spring of 2017, we addressed the steps. Our contractor saw our steps didn’t have any foundation under them (no wonder they were sagging!), so a foundation was dug, the steps were secured to the house with rebar, and the two steps into the house were re-poured and bricked to mimic the original steps. Since we were rebuilding the steps fully, we chose to make the steps the full length of our porch.
2. Painting
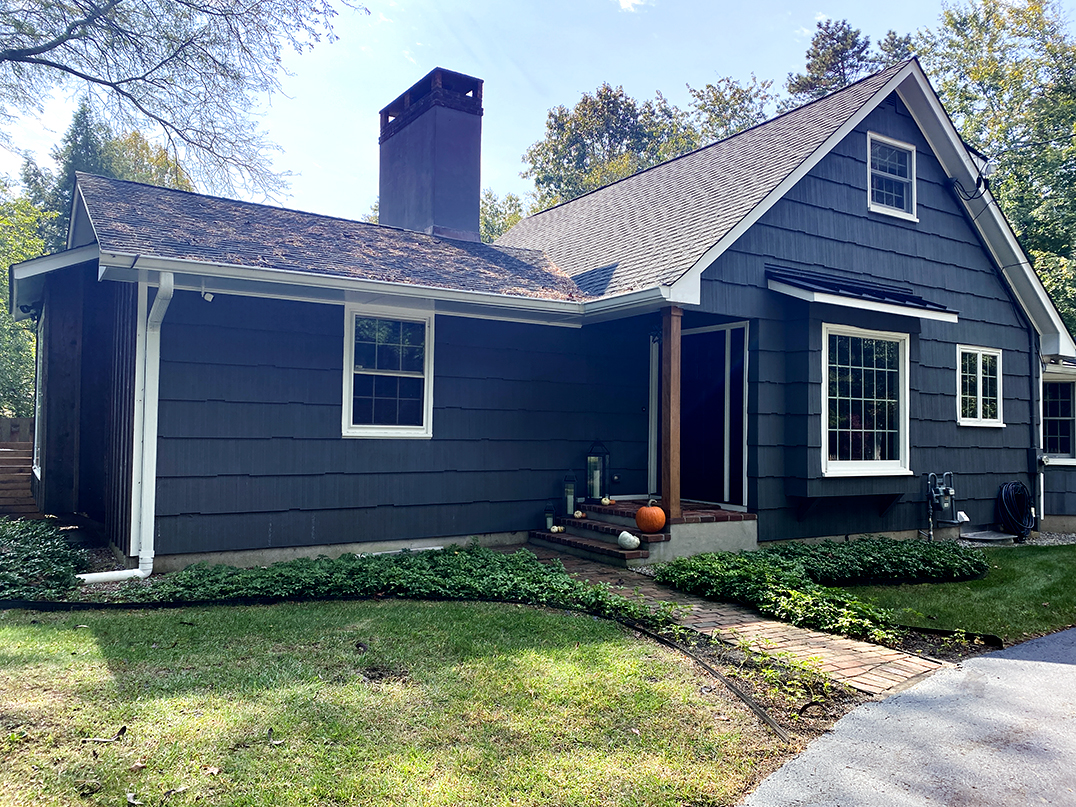
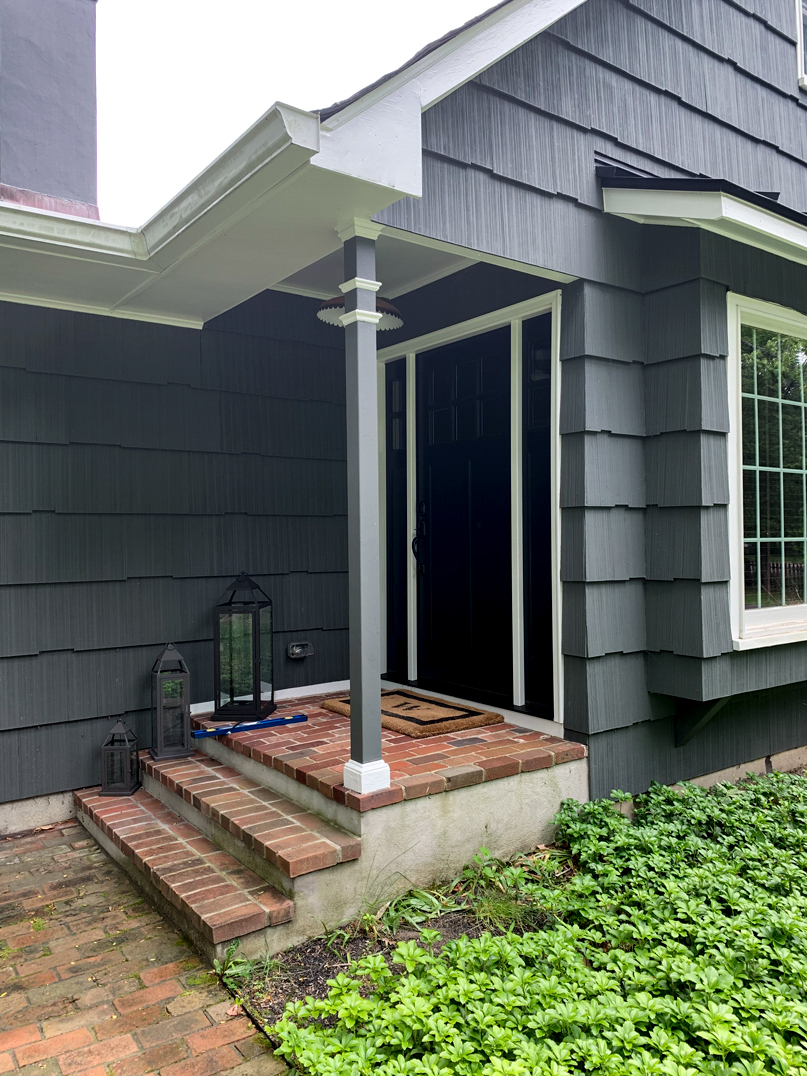
Since the new front door was installed, the siding had been repaired, and the steps to the porch redone, it was time to address the house color. And, while we had been dreaming about a moody farmhouse since 2015, we lived her in the original colors until May 2018, when I found myself with both kids in school full-time, beautiful Spring weather, and a crazy disposition to make this change happen. So, I painted the house. Yes, the exterior of the house. Myself. With a brush at that, since our siding cannot be painted with a roller. And, as exciting as that was, for this post, we will keep the scope to the front porch. We choose Benjamin Moore’s Kendall Gray for the exterior of our house. Matt and I just loved how moody Kendall Gray is against both our white trim and the shiny black front door. The house only truly felt ours after this major step.


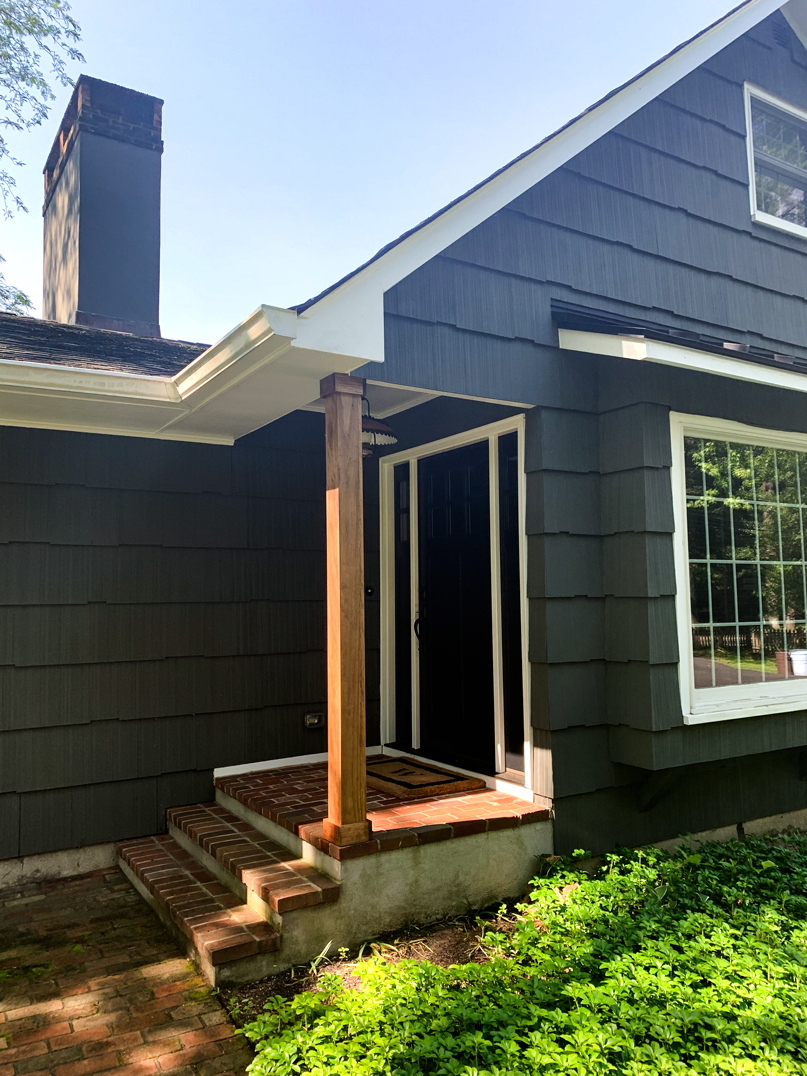
3. Chunky Wood Beam
My future vision for the exterior of our house has lots of wood details in it. The first step in bringing that vision to life was addressing that original skinny beam in our front porch. I have always known I wanted it wrapped in this beautiful wood, making it super chunky and more “us”. So, my CCO made it happen.
4. Light
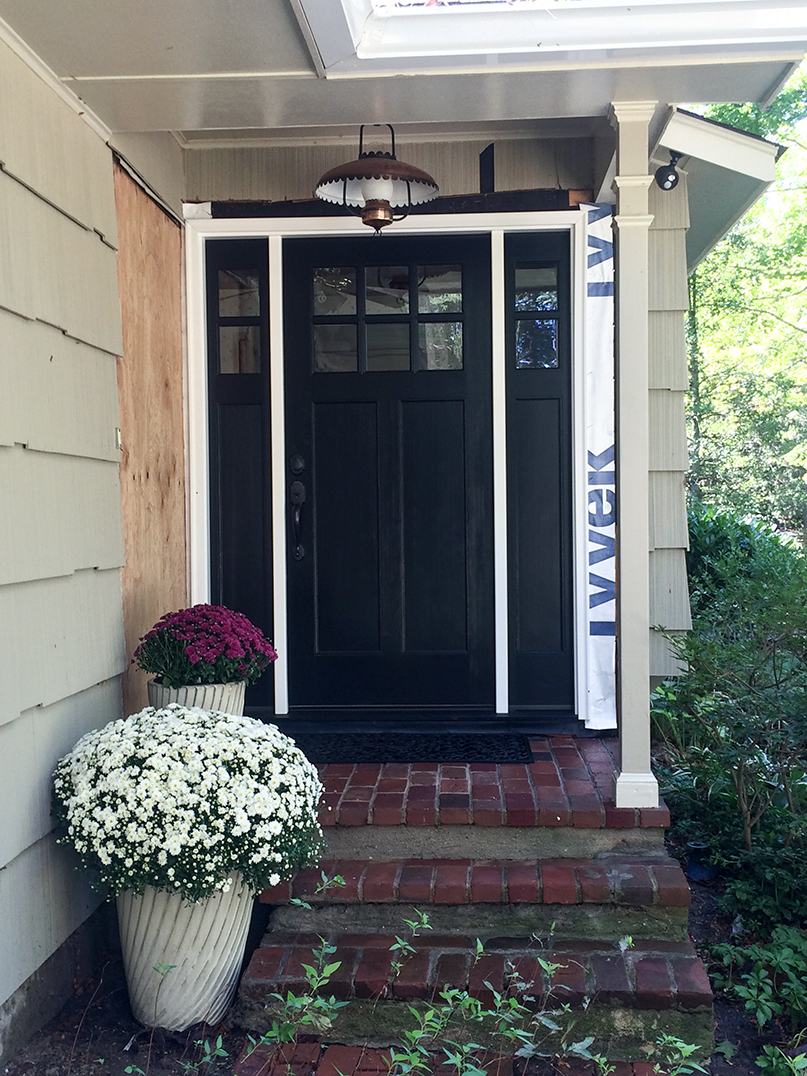
If you are super observant, you noticed we already changed the light in our front porch once. There used to be a copper lantern hanging as a light fixture in the old back hallway, that led to Harry Potty and the backyard.
Before we started construction, Matt and I saved that fixture and swapped the front fixture. However, that was an interim solution. I had known more many, many years I wanted a Moravian star. Since we lived in a Townhome with a HOA before, that dream had to wait. But in Summer 2019, it happened:
5. Basic Landscape
The landscape, specifically around the front porch, has always been an issue. Firstly, because it gets very little direct sunlight (and very scarce rain water as we have super sandy soil). Secondly, because anything bushier will filter too much of the light entering our basement windows. Thirdly, because coming from Brazil, where it is lush and green year-round, I have a real issue with deciduous plants. No bushes-that-turn-to-sticks six months of the year, please and thank you. Finally, because the deer will feast on anything we plant. So, tall order.
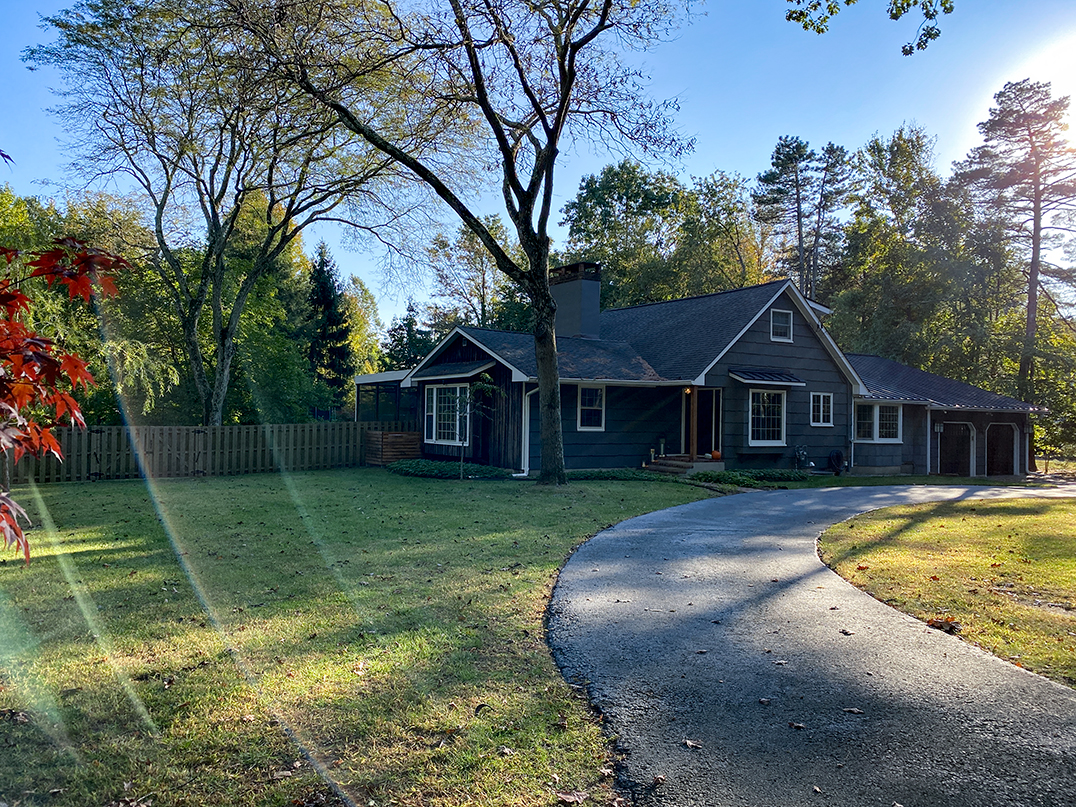
After many attempts (sadly, many Rhododendrons, Azaleas and Boxwoods lost their lives in our trials), in Spring 2020, we smarted up and took a cue from nature. Did you notice in the last photo what we had growing in abundance, wild around this area? Pachysandra! Are they the most beautiful, ornamental plant ever? No. But: 1. They withstand the sandy soil, lack of water and light; 2. They are ground covering, therefore, they don’t get too tall cutting off light to the basement (added bonus: they fill in quickly and nicely!); 3. They are evergreens, which just makes me happy in the winter! 4. The deer will NOT touch it!
Matt and I tamed the Pachysandra that was already there with metal edging, and gave some natural curves to the landscape. We used all the plants we took from where they were overgrown, to populate where we wanted them! Labor-intensive but zero dollars!
This is after one season of growth – I expect by the end of next Summer, this will be completely lush and filled!
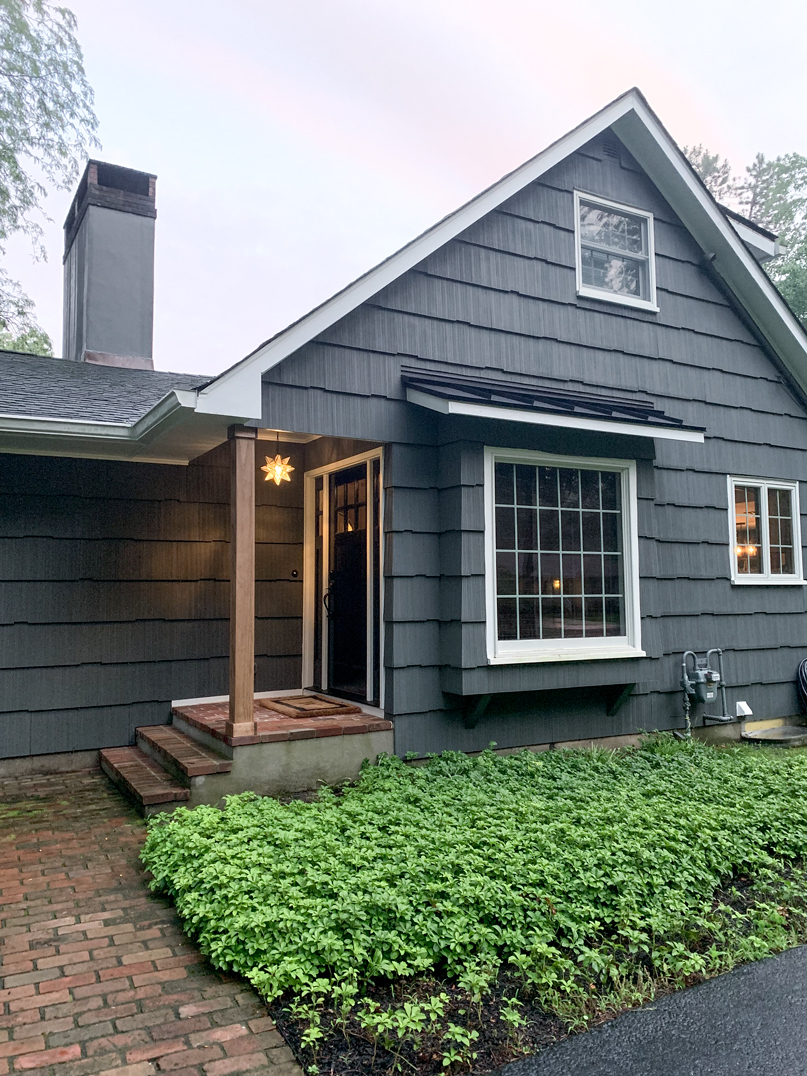
6. Porch Ceiling
Since the porch leads right into our Foyer, where we have the beautiful original skinny lap ceiling from the 1950s, I wanted to add not only a bit of interest outside (we walk by that door 200 times a day, and I always seem to have my eyes on the plain, sad porch ceiling!), but also give a sense of continuity from the woodwork in the Foyer, paying homage to the original construction of the house. Added bonus: creating a beautiful, dramatic moment the minute you walk up to the house!
This project just got done. October 2020. And, though I know some additional steps may be added to the Front Porch or Front Porch-adjacent (I feel like this space begs for a rain chain, we have to deal with the monstrosity that is the gas and water meters in front of the house…), for now, these are the steps completed. Those issues will be addressed at their own time and subcategories. And I am so thrilled with the results – both emotionally (for feeling accomplished) and with the actual results of how the house looks after this one small step:
Thinking back to 2015, the ‘whole’ (of even just the Front Porch) was completely daunting! But, by breaking the project in categories, subcategories, steps and sub-steps, not only did we accomplish a great deal, but we did it without giving ourselves a panic attack! One small achievable step at a time!

Amazing Ligia!!! The idea to changed the door to another wall, it changed the outside but it changed the inside in a so much more functional way.
Loved the idea of the greens outside that will not become “sticks for 6 months”, zero cost and beautiful.
Good advice too, not only for the house projects but for life, when you said: “ to break the whole into small and achievable one -step -at the -time projects “ 🙂