

DIY Upholstered Headboard
Share
Due to popular demand, we created a tutorial on how you can make an upholstered headboard! I am confident this is a project you can take on even if you are a newbie in DIY. Let’s break this down:
Material List
- HxW rectangle of 3/4 plywood (or 1x lumber);
- French cleat system;
- 1 1/2″ screws for wall side of cleat;
- 5/8″ screws for headboard side of cleat;
- 1/2″ stapes;
- 2″ dense foam;
- Spray adhesive;
- HxW + 4″ in each side Batting;
- HxW + 4″ in each side Fabric of your choice;
Tool List
- Circular saw (plywood or lumber);
- Drill (pilot holes);
- Screw driver;
- Tape measure;
- Staple gun (heavy duty manual or pneumatic);
- Speed square;
- Level;
- Pencil;
- Fabric scissors;
How-To
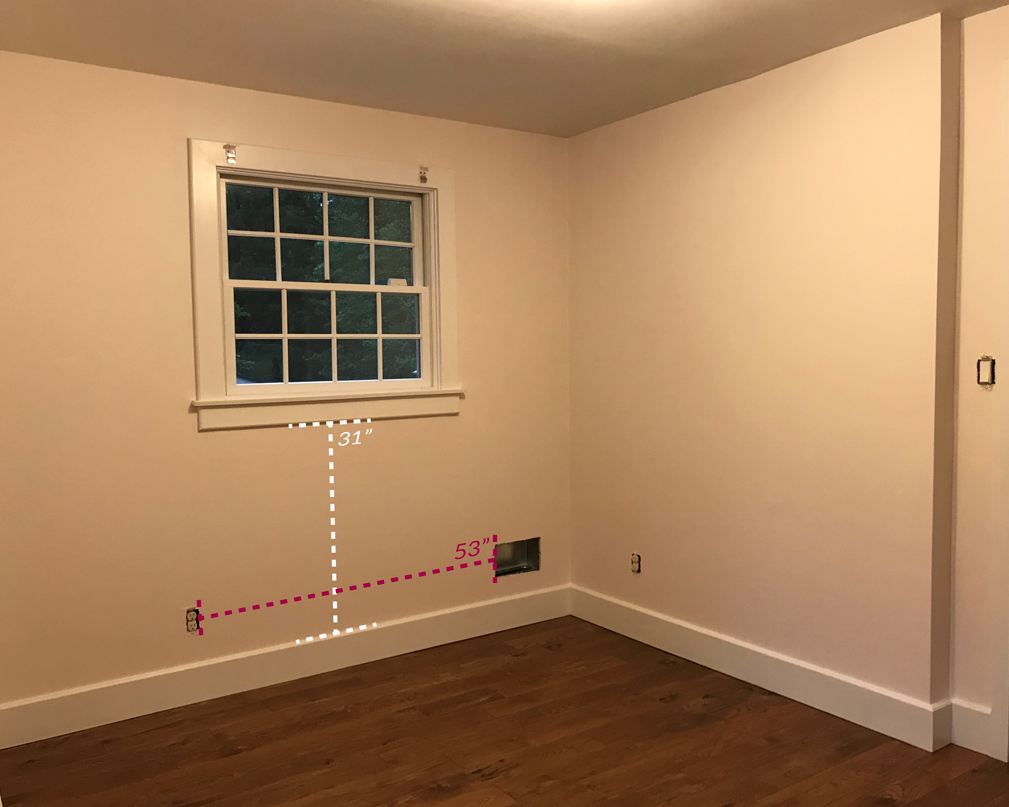
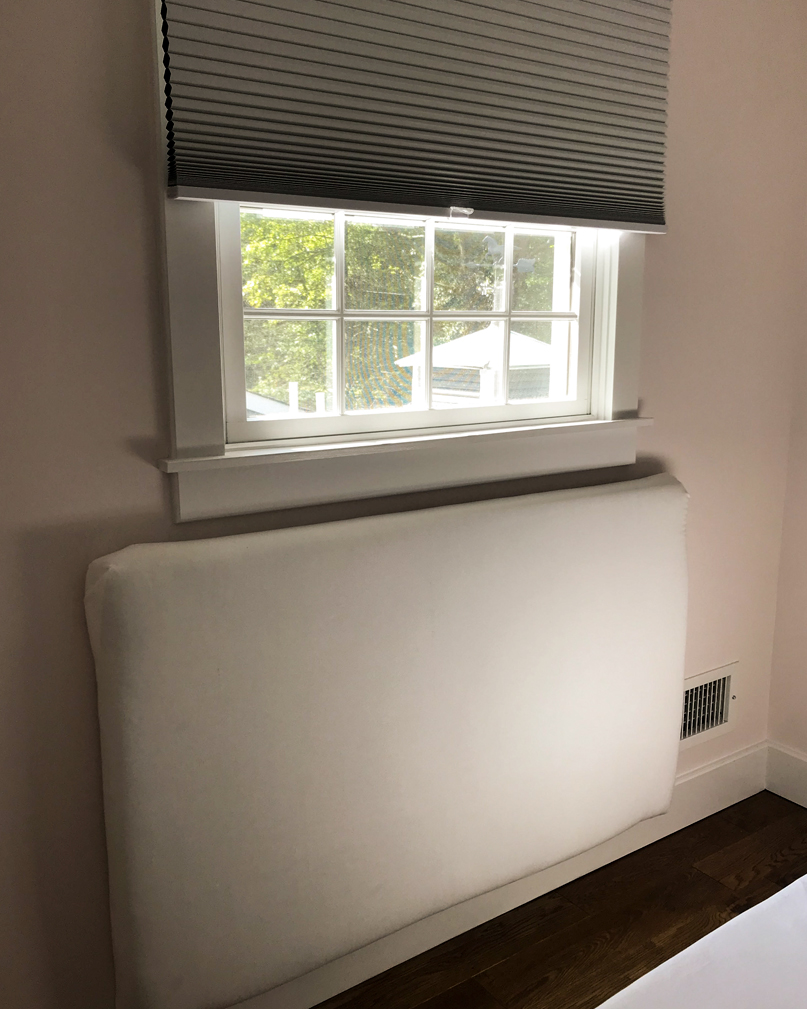
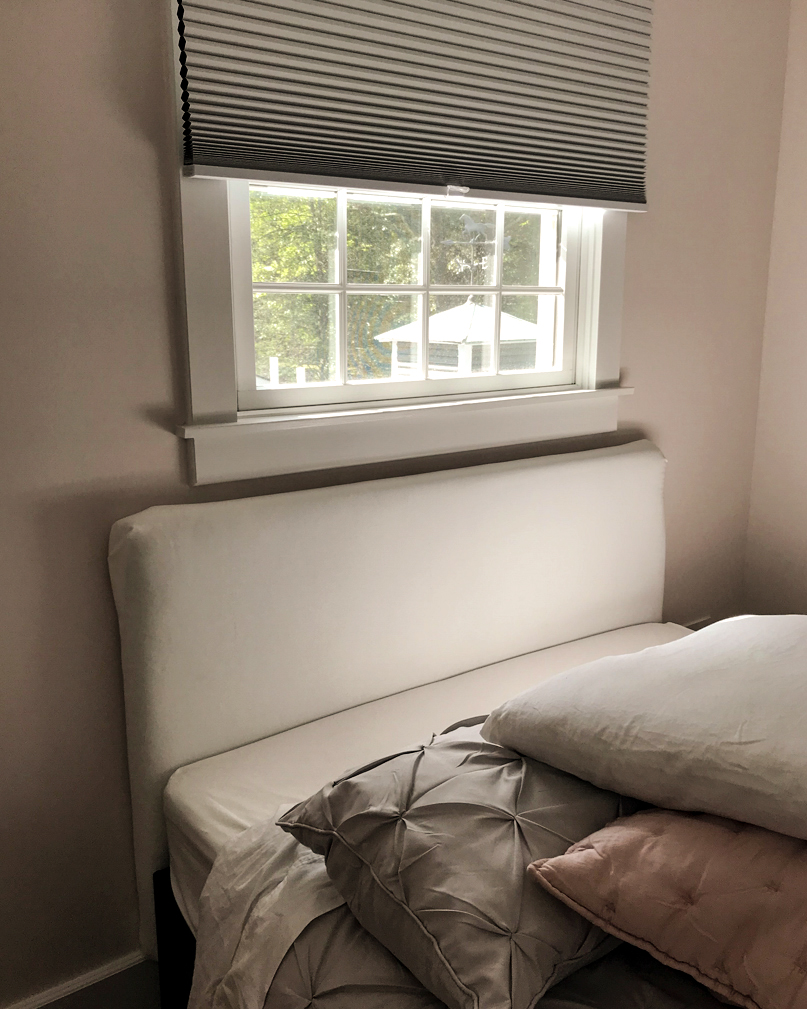
Since our daughter’s bed frame is low profile (and does not have a box spring), we wanted the headboard to start right above our tall baseboards and fully occupy the space under her window (we didn’t want the bed to look headboard-less from any angles in her room). So, height wise, we measured from the top of the baseboard to the bottom of the window trim (31″h) and subtracted one inch to allow room for top and bottom padding, for a height total of 30″. Use your own dimensions for height (H) and width (W) anywhere in the materials list.
The width of the headboard was not as critical, but our main objective in this room makeover was to keep the AC vent freely open for a nice airflow in the room, as we detailed in Room to Grow. We measured her bed frame at 51″w, and decided to add one inch of headboard room on each side of the bed frame. That made our total width 53″. Within this width, if we centered the headboard (as planned), we noticed an outlet that was going to be partially hidden at the bottom left. Since that would power any bedside lamps, I could have made the cleats offset from the wall farther with a scrap of 2×4 or 1×3, but opted instead for a surge protector with an angled plug that would not be squished by the headboard.
I then used a circular saw to cut a 30″h x 53″w rectangle out of the 3/4 plywood sheet. If you want to save some money, or do not foresee a ton of “lean against” usage on your headboard, you can build a hollow frame from 1x lumber, but I had a plywood scrap that was pretty close in size and liked the stability and rigidity the plywood would give the headboard.

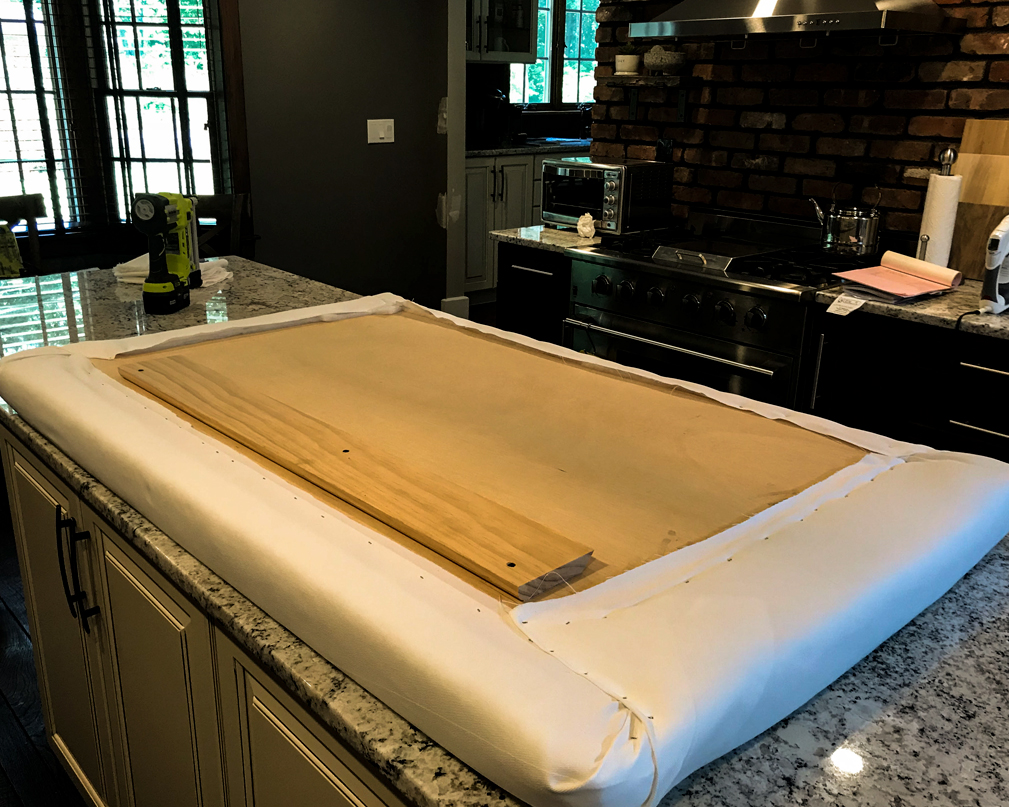
The next step was deciding how to mount the headboard to the wall. Since we had gone with a sturdy headboard, I decided to use a French cleat setup. Made by cutting a piece of wood at 45 degree angle, or purchased pre-made, these French cleats are strong and stable interlocking angles that let you lift off the headboard for cleaning or adjusting. Screw one set into the studs a little higher than halfway, then flip the matching pair and screw into the back of the headboard. Make sure the screws don’t pierce the other side of the plywood, but a quick pass with a file helps if the points do – always easier to do this before the upholstery!

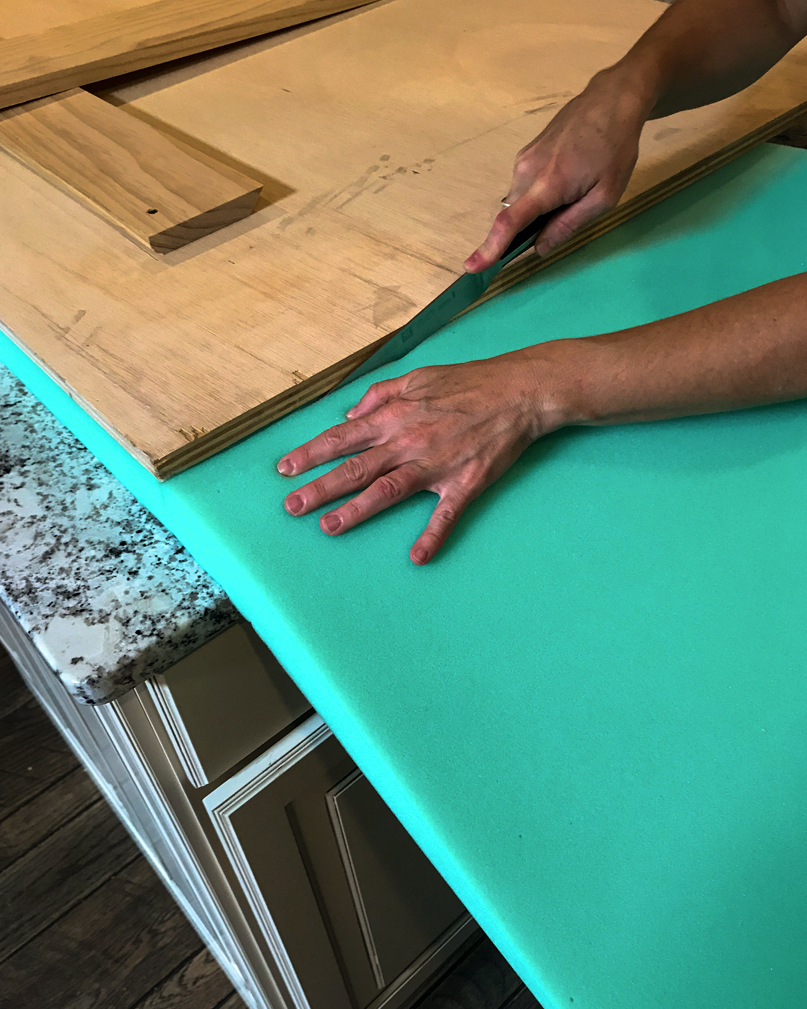
Now to the part that I have a hard time with (and that Ligia excels at!): getting the padding and upholstery square and flat. Since we wanted our daughter’s headboard to be super-plush, we used a layer of 2” dense foam. We cut it with a serrated knife down to the exact measurement of the plywood, then kept it in place with a spray adhesive.
As you can see below, it is okay if this layer isn’t perfect. 2″ dense foam can be expensive, so you can definitely use cuts to your advantage. Just make sure when you have your seams neatly meeting not to cause ridges.
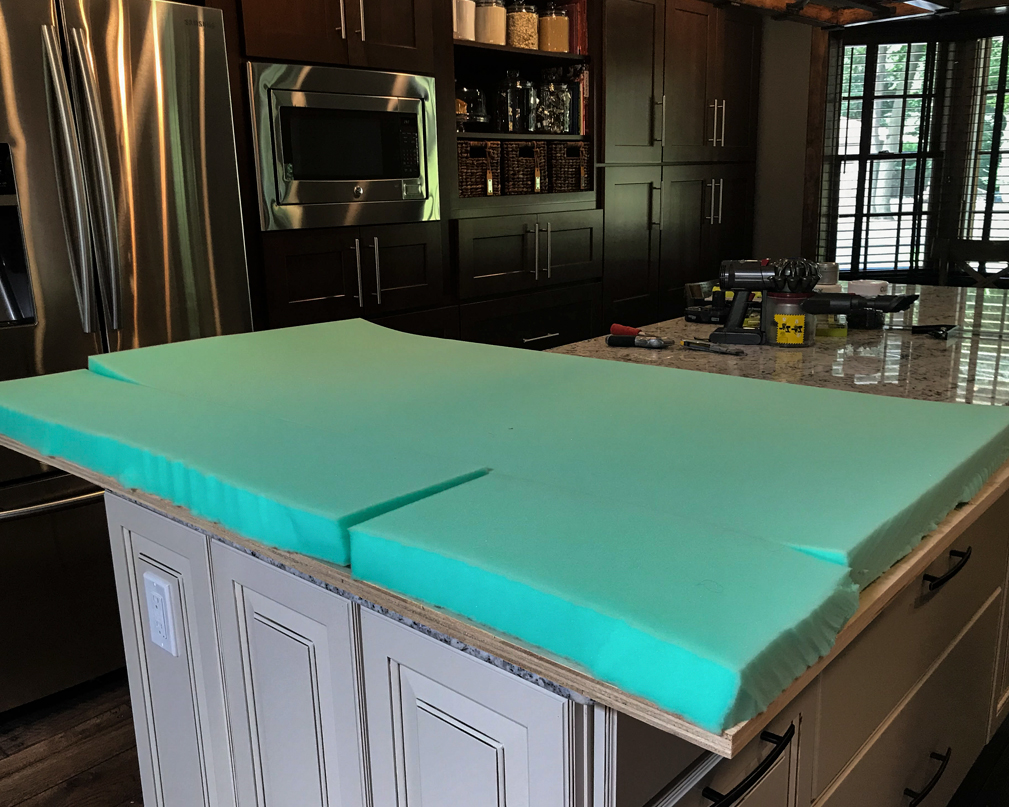
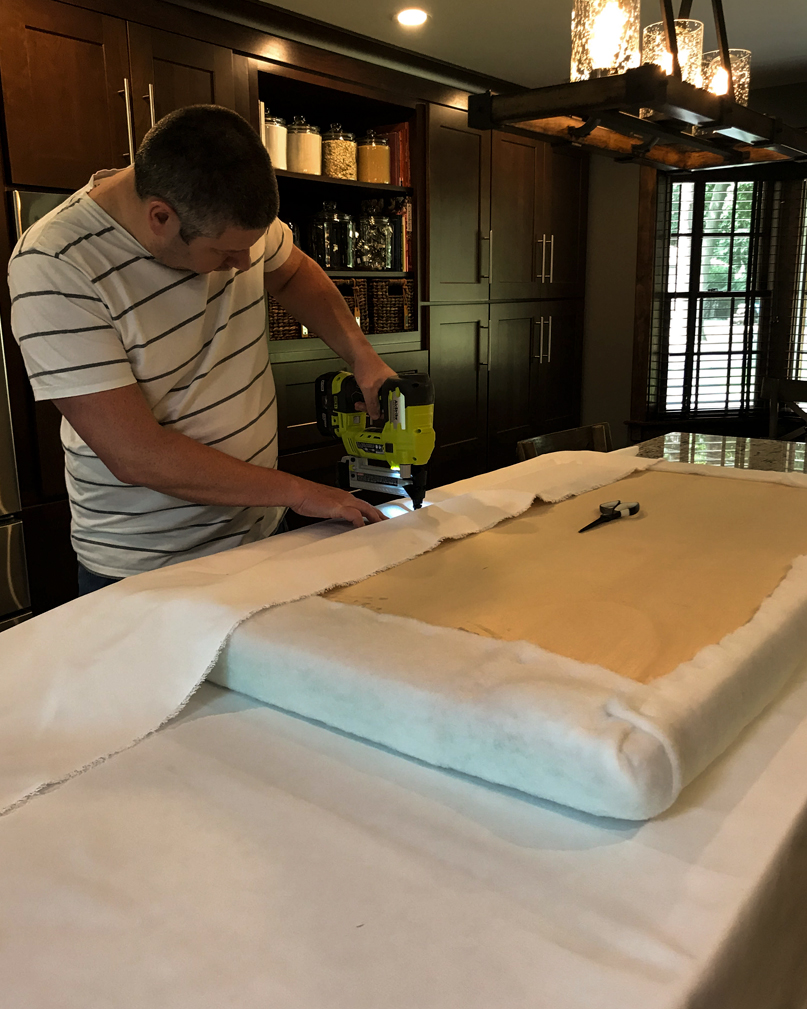
For the next layer, we stretched a 38”h x 61”w piece of batting over the front of the foam (initial height and width + 4” on each side), and wrapped it around the sides top and back. Ligia pulled and tucked the corners like wrapping a present, and then I stapled in place.
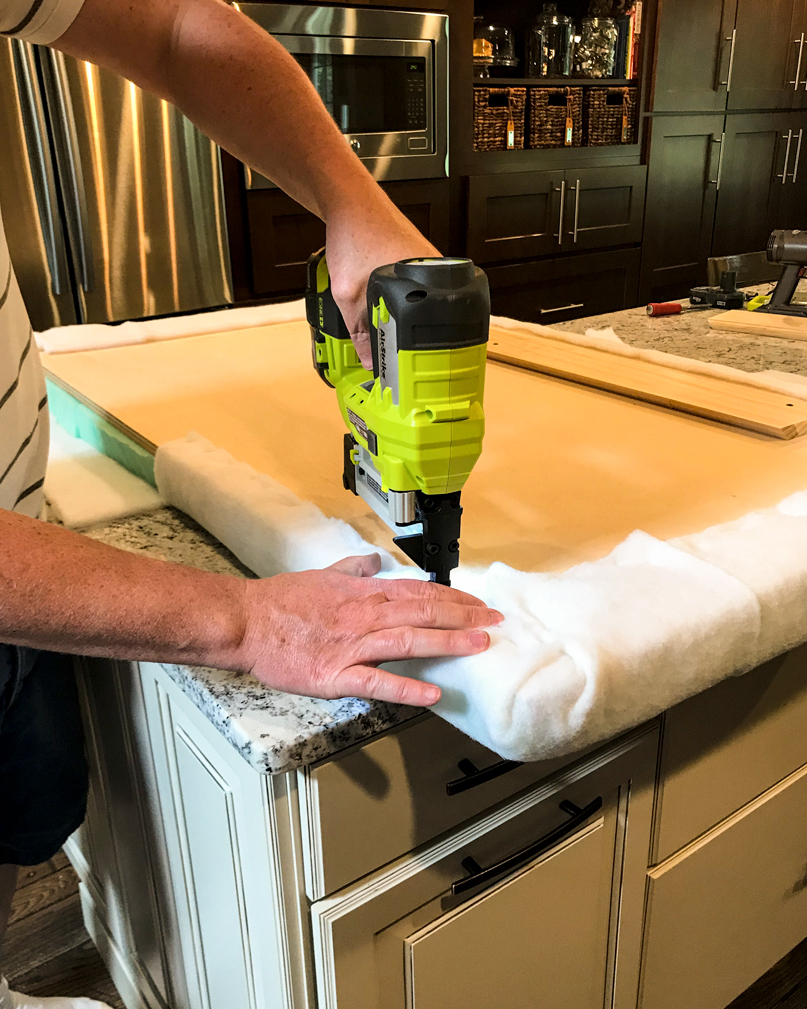

The final layer is the fabric we chose – a furniture grade cotton ducking in bright white. Ligia made sure to iron it first, as it does have a light pattern. We also made sure to keep the fabric “straight” as we repeated the same process with tucking corners and stapling.
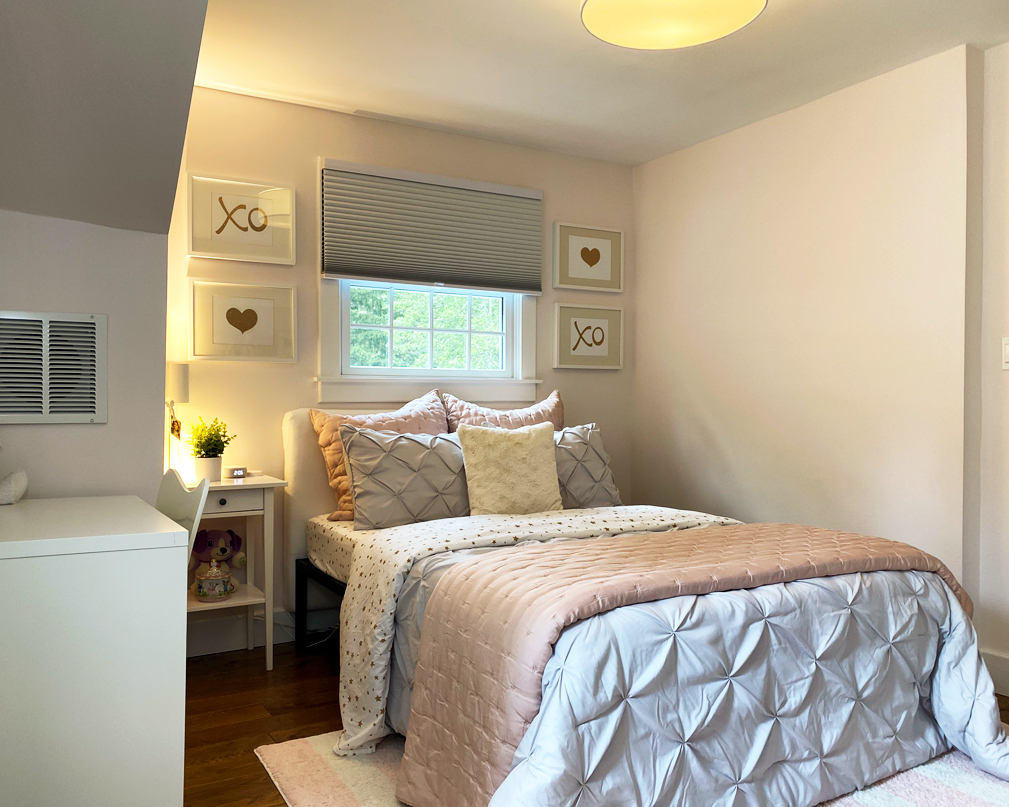
Hanging up the headboard using the cleats is simple, even if there is limited space on top, they can slide from the sides too. The 2 sides of the cleats interlock using gravity, no additional fasteners needed.
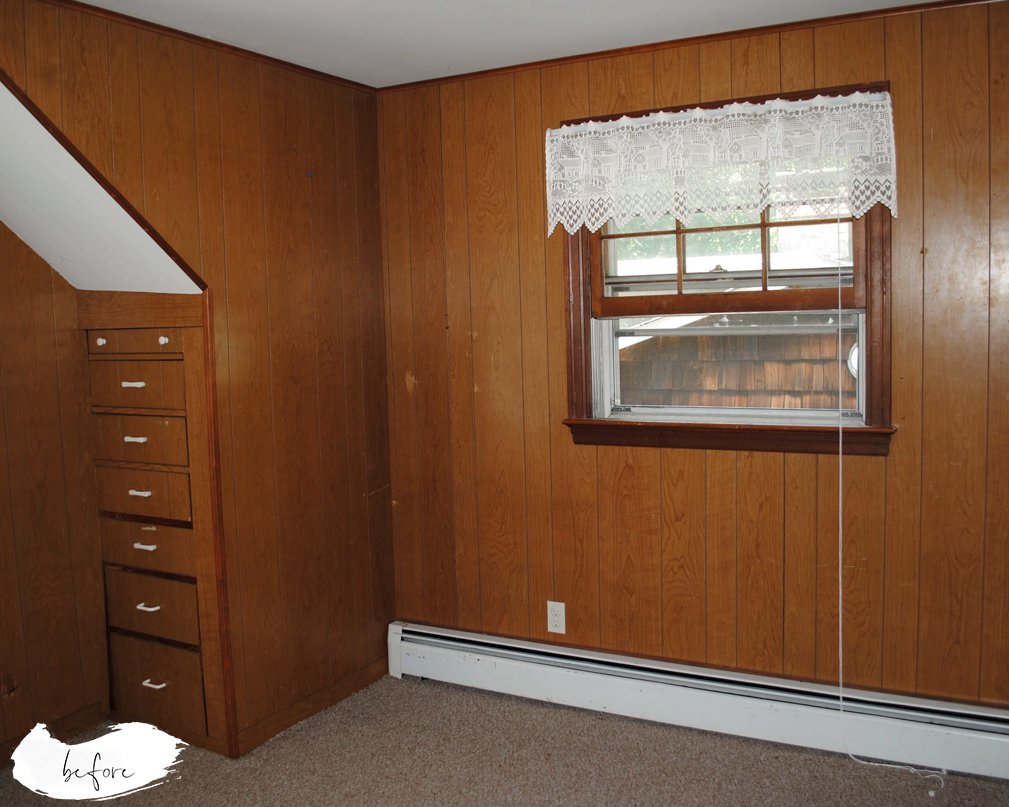
And, as a reminder of the impact small changes can have, here is a picture of how our daughter’s room looked when we purchased the house:
And how it looks now!

